Friday, December 20, 2024

Cold & Frosty Christmas Shaker Card

Welcome back to Lost Coast Portal to Creativity where Lost Coast Designs and Carmen's Veranda collide to bring you twice the inspiration and double the fun!

Greetings! Kathi here with a Cold and Frosty Christmas shaker card created with the wonderful American Gothic Christmas Rubber Stamp!


Here's a small tutorial to show I how I created it!


Use Tuxedo Black Memento ink to stamp the American Gothic Christmas Rubber Stamp onto white cardstock. Color the image and the entire panel with Copic markers. Use a white gel pen to add highlights to the holly berries. 


Use a white Uni Posca paint pen to add white dots over the image panel to make snowflakes. Adhere the image panel to a piece of plaid patterned paper from the Graphic 45 Christmastime pad. 

Pat the image panel with an anti-static pad to prevent the future shaker contents from sticking.


Cut a piece of acetate so that it's about 1" wider and longer than the matted image panel. I used the clear acetate packaging saved from a stamp, die, or stencil. 

Place the matted image panel facedown onto the acetate. Apply strong two-sided tape long the side of the image panel close to the edge of the card. Remove the tape's backing, and press the acetate onto the tape. Repeat this process so that both sides and the bottom are sealed. Use a bone folder to make sure that the acetate is firmly adhered to the back of the image panel forming a sealed shaker envelope.


Flip the shaker envelope over. Assemble your shaker elements. I've used some snowflakes and some sparkly lightweight mylar confetti. 


Pour the shaker elements into the acetate envelope. Flip the shaker over and use the two-sided tape to seal the top of the shaker.

Adhere the shaker panel to a green A2 card.


Use a scalloped rectangle frame die to cut patterned paper or cardstock. I used green wood patterned paper from the Christmas Watercolor pad by Scrapbook Customs. 

Flip the frame die-cut so that the reverse is showing. Add black foam tape to the die-cut.

Use the Noel Banners from the Holiday Sentiments Banner die set to cut white glitter paper and green cardstock. Assemble the die-cut pair. 

Adhere the banner to the top of the shaker panel.  Adhere the frame die over the shaker image panel as shown.

You still have time to join our Cold and Frosty December Challenge. I do hope you participate!


Wednesday, December 18, 2024

A Little Piece of Moon

Welcome back to Lost Coast Portal to Creativity where Lost Coast Designs and Carmen's Veranda collide to bring you twice the inspiration and double the fun!
 
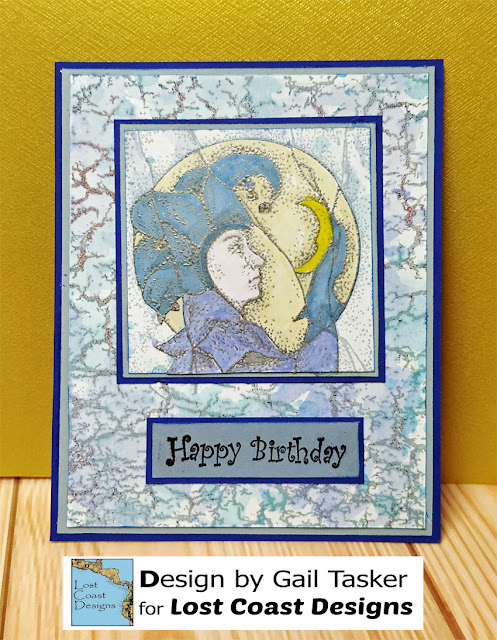
Hello Portal Peeps!   Gail here today.  The Cold and Frosty Challenge makes are looking lovely.  Don't forget to add yours to the linky for a chance to win.   I went with blues for cold and glitter for frost with this lovely Jester Square from Carmen's Veranda.
I stamped and embossed the Pondscum Background stamp with some glittery embossing powder and smooched on some distress inks in shades of blue.  I stamped Jester Square, embossed with silver embossing powder and coloured with sharpies.  The happy birthday is from the Party Words set.
Hope you like my cold and frosty birthday card.  You have all month to link up your stamped anythings for a chance to win if you get some time away from all the festive crazy.

Monday, December 16, 2024

"cold and Frosty" challenge. Lets party in the snow.

Welcome back to Lost Coast Portal to Creativity where Lost Coast Designs and Carmen's Veranda collide to bring you twice the inspiration and double the fun!

 
Hello everyone, Riet here.
my contribution to the
 "Cold and Frosty" challenge is a Christmas card.
I will tell you how I made it.

I used:

Distress ink:
Tumbled glass
Weatherd wood
Distress oxide: 
Chipped sapphire

Black waterproof ink.
Versamark.
Holly leaf die.
Snowflake stencil.
White embossing powder with a sparkle.
Nuvo glitter gloss silver.
Wax stamp.
Silver metalic marker/pen.
Light blue marker or pencil.
Heattool.
Dark blue cardstock 13.5cm x 18cm.
White card 9.5cm x 14cm.
White cardstock 9.9cm x 14.4cm

Make this background by going over the stencil 
with tumbled glass and weathered wood.
Lightly spray some water on it.
Print it on the paper.
Take another piece of paper and make a puddle with the two inks.
Dab your paper in it and make spots, 
we will die cut the holly branches out of this paper.

Stamp the girl with black ink.
Color her with the blue marker/pencil.
Cut her out and glue her on the card.

With the longswirl you stamp top left with the versamark.
Sprinkle the embossing powder and heatset it with the heat tool.

Stamp the words with black ink.


Take a dark blue cardstock of 18x13.5cm.
Cut or punch the corners off.
Stamp it with the stamp of the pieces of architecture and Distress oxide chipped saphire.
Set aside to dry thoroughly.

Die cut the holly branch twice.
Make the berries silver with the metallic silver marker.

Make a wax seal.
Of course it's up to you. 
You can make a wax seal, or something else. 
A poinsietta is also a great idea.

Assemble the card and finish it.
Now we go with the Nuvo glitter over the girl.
I did the fur edges on her coat. 
Also the bow on her leg and neck, her hair and shoes.
It's a shame, the glitter is so hard to see in the photos.

That's it for today, I hope you enjoyed it.
Have you also made something that is cold and frosty?
Then join our challenge.
The design team would love it if you join.
You also have a chance to win stamps of your choice.
And you don't even have to join with LCD stamps.
(Read the rules.)

Sunday, December 15, 2024

CHALLENGE #192 - COLD AND FROSTY REMINDER

Welcome back to Lost Coast Portal to Creativity where Lost Coast Designs and Carmen's Veranda collide to bring you twice the inspiration and double the fun!
 
Hello Portal Peeps!!
The Cold and Frosty Challenge continues all month here at the Lost Coast Portal to Creativity.
 
Our challenges are now monthly!  A new challenge starting the 1st every month, with chances to win Lost Coast dollars. We will be announcing winners on the 5th of the month, so do pop back and see who wowed the team and gets our snazzy blog badge and the coveted Lost Coast dollars.

CHALLENGE #192

COLD AND FROSTY

Tis the season and we want to see your stamped anythings with a cold and frosty look.  Sounds like an excuse to get out the glitter!!!!   Real rubber or clear stamping and the theme must be the focus of your project.  A small stamped sentiment in a sea of die cuts or digi images will not qualify to win the prize and you may be deleted!!!!  Bwahahhaaahaha.

Please read the updated Challenge Rules to ensure your entries qualify to win this month's prize!

You are welcome to play in our Challenges using rubber stamp images from any company but if you use any of our Lost Coast Designs or Carmen's Veranda stamps...we love it when you do...then you could win a bigger prize in our random prize drawing.  All winners get our snazzy Challenge Winner's Badge to proudly display on their blogs!

If you don't have a blog then no prob, you can still play in our challenges by sharing your projects from public photo sharing sites which includes our Facebook Company Pages for Lost Coast Designs and Carmen's Veranda.  Please include our Challenge info and the link back to our challenge in your photo's description!  As long as the privacy setting for your photo is public you're good to go.  See, it's so easy to join the fun!  FYI, you can't link up projects shared in closed Facebook groups! 

Here's some inspiration from the team to chilly us along.  ENJOY!
 
  Aimee used Lost Coast Designs Pompom Gnome

Liesbeth used Lost Coast Designs Cracked Grass and Sky, Megan´s Christmas Bird (branches with light bulbs, stars) and Misc. Words.

Now it's your turn.  Are you up for the challenge?  We can't wait to see your projects!  
Submit your entries in the linky party below by 23.59 PST on the 31st and don't forget to follow us so you don't miss anything!  The team will be posting more inspiration throughout the month so check back and join the fun.

Happy Stamping!
Gail
Challenge Host

Challenge #192 - Cold and Frosty
December 1st - 31st Please read over out RULES to be sure your entries qualify you to win!
ALL rubber stamp companies are welcome.
Linky closes Tuesday, December 31st 23.59 PST.
All entries must be entered in our link up but your don't need a blog to win.  See our RULES page for more info


Saturday, December 14, 2024

Wintery tag

Welcome back to Lost Coast Portal to Creativity where Lost Coast Designs and Carmen's Veranda collide to bring you twice the inspiration and double the fun!

Goodmorning, Cathy here with a wintery tag for you all.


Stamps Used:

I started out with a digital tag that I printed out. I then stamped the middle of the Mona window randomly on the background I did the same thing for the small snowflake set and the Doodles circles;
 

I stamped the CDRoly jester on white cardstock and colored it in with copic markers.
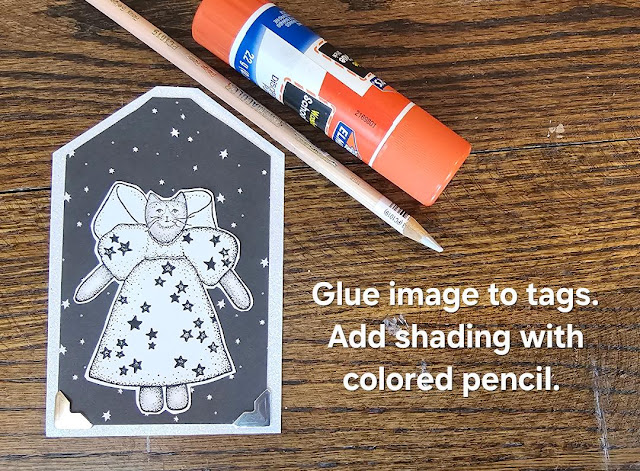
Lastly, I added a sliver pipe cleaner and some snowflake glitter to the tag.


Come join the fun.

Wednesday, December 11, 2024

Brrrrr! Birdie

Welcome back to Lost Coast Portal to Creativity where Lost Coast Designs and Carmen's Veranda collide to bring you twice the inspiration and double the fun!

Hello stamping friends, Aimee here! The Cold & Frosty Challenge is right up my alley--I live high up in a Utah canyon where it's cold all winter. In fact, it's snowing right now as I write this blog entry. 

Black-capped Chickadees are one of my favorite birds, so seeing this little guy all dressed up, ready to attend his neighborhood Christmas party, was fun inspiration for this month's Challenge. Follow along with these photos to see how I made this card using the stamp Megan's Christmas Bird.
So, bundle up in some cozy clothes, light a fire in the fireplace, make a cup of rich hot cocoa (with whip cream!) and start creating your submission for the Cold & Frosty Challenge. Please post it to the Lost Coast Portal to Creativity before the end of the month for your chance to win a prize!


Tuesday, December 10, 2024

Peace is golden

Welcome back to Lost Coast Portal to Creativity where Lost Coast Designs and Carmen's Veranda collide to bring you twice the inspiration and double the fun!

Hi Darlene here with my second make for the month with the 
Cold and Frosty theme


I chose a simple make, but hope to get the message across during this Holiday season

Using one of the Dictionary stamps - PEACE - it is embossed in gold onto 4 x 4
white cardstock

with a gold wreath die cut to wrap around the words


Edges of the 4 x 4 are also embossed in gold

layered onto 4 1/4 by 4 1/4 gold  cardstock

then the card base is 5 1/2 x 5 1/2

Want to win some rubber ????
Show us your make at Lost Coast Designs


Saturday, December 7, 2024

Cold and Frosty Gnome Christmas Card

Welcome back to Lost Coast Portal to Creativity where Lost Coast Designs and Carmen's Veranda collide to bring you twice the inspiration and double the fun!

Greetings! You've got Kathi here with a Christmas card created with the Looking Up Gnome from the Mini Gnomes 2 Unmounted Stamp Set by Lost Coast Designs. In the first panel our hero Gnome is enjoying nice weather, but dreaming of a white Christmas. In the second panel, his wish came a bit too true for him.

Here's the card. 


I used .25" wide washi tape to tape around the edges of a 5.25" x 4" panel and down the center to create two panels.

Tuxedo Black Memento was used to stamp the looking up gnome from the Mini Gnomes 2 Unmounted Stamp Set by Lost Coast Designs in the right panel. I scooted the taped panel over to the right and stamped him again onto the left panel. Both gnomes were colored with Copic markers. 

The Gnome was stamped two more times onto repositionable sticker paper, which was fussy-cut and placed over both gnomes as a mask. 

An acetate mask was placed over the bottom part of both panels. Desert Sand Memento Ink and Worn Lipstick Distress Ink were lightly brushed over the stalks and caps of a mushroom cluster part of the Mini Whimsical Shrooms stencil onto the image panel and onto repositionable sticker paper.

The sticker paper versions were fussy-cut and placed over the mushrooms to mask them. Tumbled Glass Distress Ink was sponged over the masked mushrooms, the masked Gnomes, and over the acetate mask on the bottom of the panel. 

Bundled Sage Distress Ink was brushed over the fern cluster from the same stencil onto the image panel.

The acetate mask was lifted and Desert Sand Memento Ink was brushed over the bottom part of the image panel.

The masks were removed from the mushrooms and gnomes. The mushrooms were colored with Copic markers. The left panel was covered and flat white and shimmery white Pan Pastel was brushed over the right panel. When the Gnome was obscured, a white Posca Paint pen was used to add white splatter and more intentional snow covering to the panel. When the Posca paint was dry, a clear glitter pen was used to add touches of sparkle to the snow.

The washi tape was removed from the image panel.

A piece of translucent vellum was backed with double-sided tape, then cut with a speech bubble cutting die and the dots from other speech bubble dies. Christmas-time Remnant Rubs were used to add the "Dreaming of a White Christmas" to one of the speech bubbles. Jet Black StazOn Ink was sponged through the "Seriously?" Stencil onto the other speech bubble. 

Both vellum sentiment speech bubbles and the vellum dots were adhered to their respective panels. White Posca pen was added to the "Seriously?" Speech bubble to reinforce the snow-mageddon theme.

A piece of 5.5" x 4.25" patterned paper was adhered to an A2 card then edged with Worn Lipstick Distress Ink. The image panel was adhered to finish the card.

I hope to see you playing along with December Cold and Frosty Challenge. 


Thanks for visiting today!

Friday, December 6, 2024

Cold And Frosty Cookie Basket

Welcome back to Lost Coast Portal to Creativity where Lost Coast Designs and Carmen's Veranda collide to bring you twice the inspiration and double the fun!
 
Hello Portal Peeps!!  Gail here today with a little project to hold some cookies.   I did some baking and thought it would be nice to give some away in a cute little basket.  I've used blues and snowflakes and glitter for that Cold and Frosty look.

I used Carmen's Veranda Reindeer Doll with Lost Coast Designs Small Snowflakes and ATC Doodle Circles stamps.  I altered the measurements from a tag holder project I made the other day, increasing the basket size to accommodate my cookie package.

I started by stamping Reindeer Doll twice on white card, because I need an image for both sides of the basket.  I masked and stamped ATC Doodle Circles with pale blue ink all over the card.  I need some extra pieces of background for the sides and handle.

I stamped the Small Snowflakes with dark blue ink and coloured the deer with shades of blue distress markers and Promarkers.  I gave the dress a watercolour wash.  I cut the stamped panels with a tag die and backed with the blue card I used to make the basket.  Then I added some glitter, cos you need a bit of sparkle at Christmas.

Here's a view of the finished basket with my pig shaped cookies on the side.

We hope you get some time to stamp and join us at the Cold and Frosty challenge.  Don't forget to pop back and check out all the awesome inspiration from the team.  

Thanks for dropping by.  Hugz

Thursday, December 5, 2024

OCTOBER AND NOVEMBER WINNERS

Welcome back to Lost Coast Portal to Creativity where Lost Coast Designs and Carmen's Veranda collide to bring you twice the inspiration and double the fun!
 
Welcome Portal Peeps!!!
It's time to announce the winner of our November Challenge, and way past time to announce our October winner, so I'm popping them both in this post!

We would like to thank everyone who entered their lovely projects and an extra special thank you to those who used Lost Coast Design and Carmen's Veranda stamps.  We do love seeing them and you of course get a chance at a bigger prize when we award it.  Thanks for playing with us!

Please do read the rules and also the challenge guidelines which are written under the challenge badges on the challenge post and in the sidebar.  We have to disqualify entries that do not comply with our rules or challenge themes. 
 
Unfortunately neither challenge had enough participants to award the stamp prize.
Please tell your friends about our challenge.  It makes me happy to be able to give away some stamps, but we do have to have at least 20 eligible entries.  So today we will be giving away our cool blog badge.

WINNER of CHALLENGE #190

31 DAYS OF HALLOWEEN

is

Chantal
 
with this gorgeous card featuring Lost Coast Designs Small Skeleton


WINNER of CHALLENGE #191

GNOME-VEMBER

is

Sylvia Koning 
 
 with this cute card using Lost Coast Designs Reindeer Gnome

Congrats Chantal and Sylvia.  Here's your snazzy Challenge Winner's badge for your blog!
Please link your badge back to us here at Lost Coast Portal to Creativity.
 

Our current challenge is

COLD AND FROSTY

Link up your stamped projects featuring anything Cold and Frosty
 for your chance to win Lost Coast Dollars.
 

Wednesday, December 4, 2024

Cold and Frosty: Winter Castle ATC

Welcome back to Lost Coast Portal to Creativity where Lost Coast Designs and Carmen's Veranda collide to bring you twice the inspiration and double the fun!

Hello everyone, Liesbeth here showing you my Winter Castle miniature. Our new Challenge is called Cold and Frosty! Hope you will join in!


This is how I made this ATC: First I stamped and gold embossed the border (ATC borders set) and cut it out. I masked the border and stamped the castle from Mini Butterfly Collage and one of the Large Snowflakes set with black waterproof ink. I removed the mask and coloured the card with Zig markers and water, like watercolor painting. I finished, as always 😁, with glitter glue. I glued the card onto a black ATC-card.

A detail of the ATC.


Have fun!  See you next time,
                                                             LiesbethXX