Showing posts with label Flying car. Show all posts

Sunday, March 24, 2024

Man will fly

Welcome back to Lost Coast Portal to Creativity where Lost Coast Designs and Carmen's Veranda collide to bring you twice the inspiration and double the fun!

Goodmorning all, Cathy here with a card for you today.
Stamp Used:


I started with a stencil and some distress oxide ink. I randomly did that all over the card. I then stamped Flying car in the middle with black ink. 
I then took a ruler sticker and added to the card along with some die cut gears. Next, I added a sliver star I cut in half to one of the die cut gears. 
I added it to a black card base and the card is done.


Thursday, February 22, 2024

#182 For the men challenge

Welcome back to Lost Coast Portal to Creativity where Lost Coast Designs and Carmen's Veranda collide to bring you twice the inspiration and double the fun!


Hi stampers, Riet here.
Today a card "for the men" challenge.
I chose a steampunk card.
And this is what you need if you want to make this card.


Distress ink,
Walnut stain,
Broken china,
Rusty hinge,
Weathered wood.
Stazon Timber brown,
Versa Magic Jumbo Java.
Versa mark.
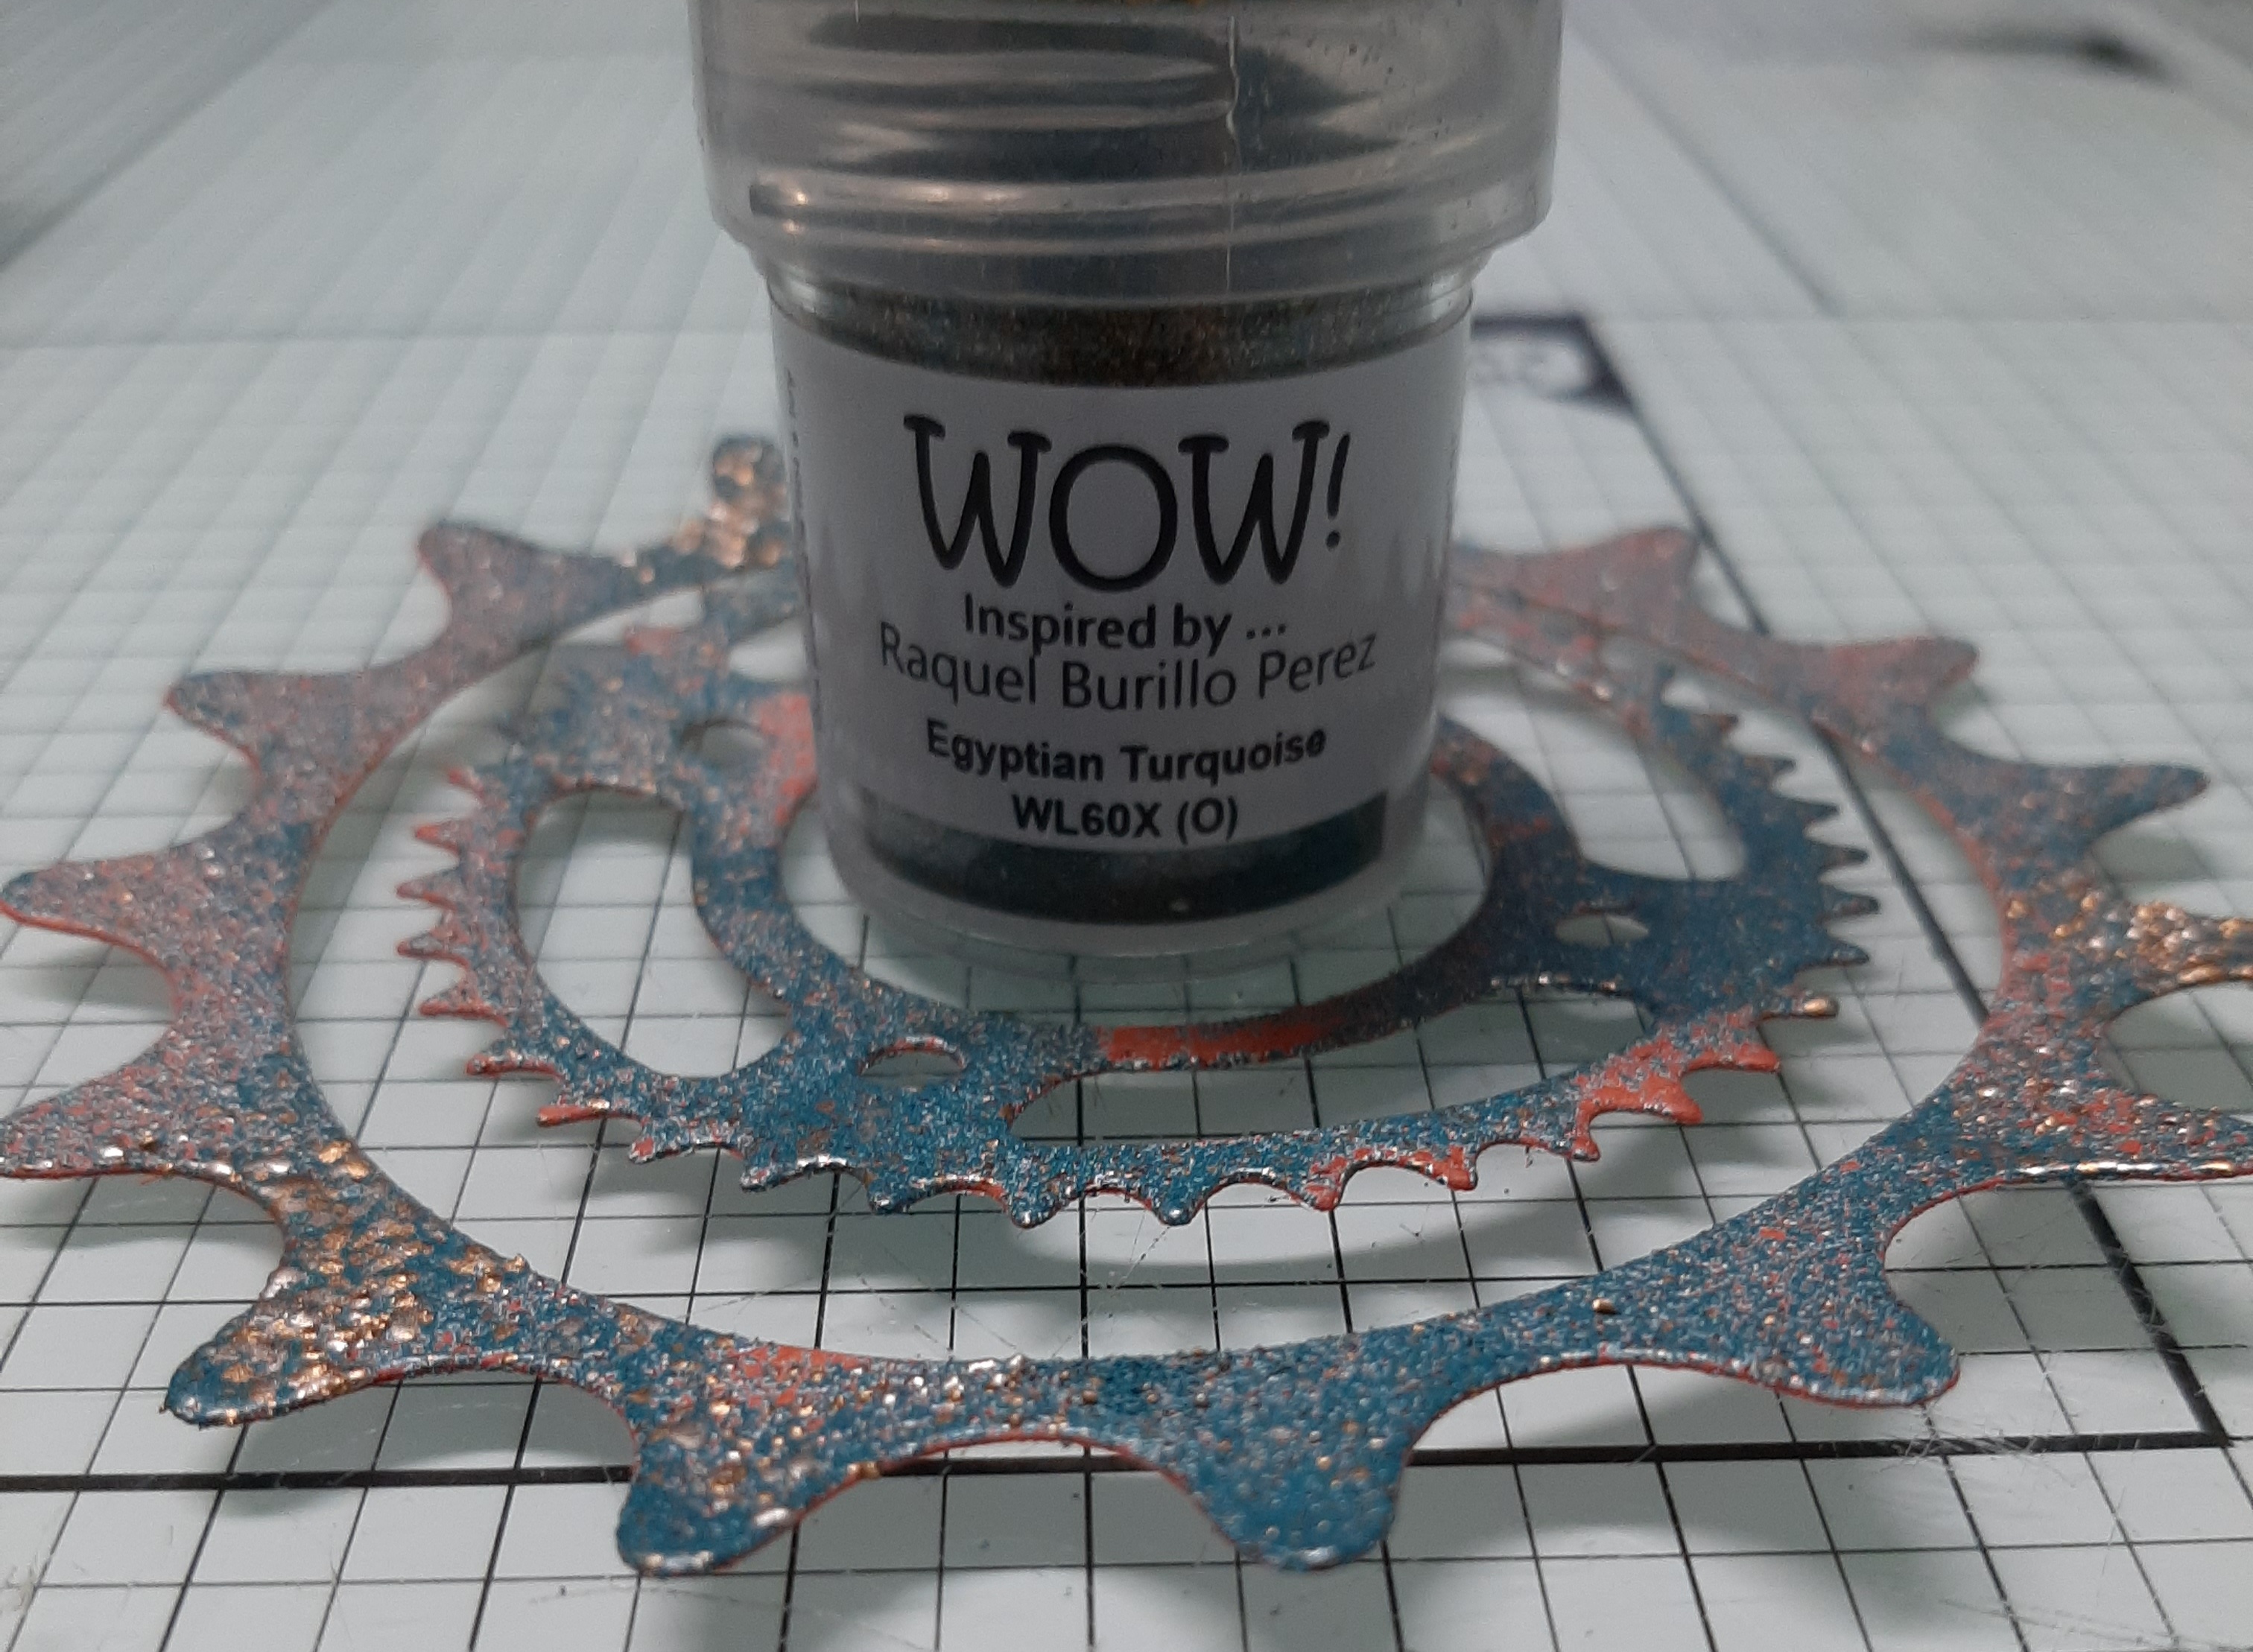
WOW EP Egyptian turquoise.
Ranger EP Hamered=bronze colored
Corrugated cardboard.
Gears die, I used Spellbinders.
Brown and turquoise acrylic paint.
Coloring pencils or markers.
I used Derwent Colorsoft.
Foam tape.

How this card is made.
I started stamping the gears 2 stamp with versamark.

I sprinkled the Ranger hammered embossing powder on top.
Let it melt with the heat tool.

Color with a ink blending tool,
 and the Distress ink colors 
Broken china, Rusty hinge, Weathered wood the card.

Cut off the rest of the card,
 and then take a small edge of the embossing powder with it.
You stamp the text on this piece with the Stazon brown timber.

Now take a piece of corrugated cardboard.
Make sure it goes well around the card with the gears.
Paint the entire piece of corrugated cardboard with brown acrylic paint.
Dry with a heattool.

Repeat this with turquoise paint, but now only paint here and there.
The brown paint should remain clearly visible.

Now we take a piece of orange paper that is larger than the gears card,
 but smaller than the corrugated cardboard.

Distress the edges with a tool.

Make a puddle of Distressink walnut stain and water and dip the edges in it.

Die cut two sizes of gears from orange paper.
I used a set of Spellbinders.

Apply Versamark on the gears, 
but leave spots free so that the orange can still be seen later.
Sprinkle the WOW Egyptian turquoise on the gears.
Melt with the heat tool.

Isn't that beautiful?
Love the result of the embossing powder.

Now you can assemble the card by glueing the layers together.
I stuck the small gear with 1 layer of foam tape.
I stuck the large gear on with double thick foam tape.
Glue the Adventure and the flying car on.


And now you're done.
Hope you guys liked it.
Remember, you still have time to join the challenge.
You have a chance to win new rubber stamps.
But because the rules have changed, I would like to ask you to read the rules first.
This way you avoid disappointments.
Hope to see your participation at the challenge.
I wish you good luck.


Saturday, January 1, 2022

CHALLENGE #135 - LET'S FLY!

Welcome back to Lost Coast Portal to Creativity where Lost Coast Designs and Carmen's Veranda collide to bring you twice the inspiration and double the fun!
 
Hello Portal Peeps.  Happy New Year!!! 
We hope you have had an awesome festive season and are ready for a new year of fun and inspiration here at the Lost Coast Portal to Creativity.
 
It's time for our new Challenge.
Our challenges are now fortnightly!  A new challenge starting the 1st and the 15th of every month, with chances to win Lost Coast dollars. We will be announcing winners on the 5th of the month, so do pop back and see who wowed the team and gets our snazzy blog badge and the coveted Lost Coast dollars.

Now for our new Challenge!

CHALLENGE #135

LET'S FLY!


Your stamped anythings must feature something that flies.  Birds, insects, balloons, dragons, angels etc etc.  Please remember we are a real stamp challenge and rubber or clear stamping and the theme must be the focus of your project.  A small stamped sentiment in a sea of die cuts or digi images will not qualify to win the prize and you may be deleted!!!!  Bwahahhaaahaha.

Please remember we do have some Challenge Rules to follow so look them over to ensure your entries qualify to win this month's prize!

You are welcome to play in our Challenges using rubber stamp images from any company but if you use any of our Lost Coast Designs or Carmen's Veranda stamps...we love it when you do...then your entry counts as two which doubles your chances of winning in our random prize drawing.

PRIZES

To ensure you all have a fabulous time playing in our Challenges this is how our Prize system works!
The more entries the better the Prize so tell all your friends to join the fun too!

1 - 4 Entries = one winner chosen by the team is awarded our Challenge Winner's Badge
5+ Entries = one randomly picked winner will receive a $5 gift certificate to spend at
Lost Coast Designs/Carmen's Veranda
10+ Entries = one randomly picked winner will receive a $10 gift certificate to spend at
Lost Coast Designs/Carmen's Veranda
and all winners get our snazzy Challenge Winner's Badge to proudly display on their blogs!

If you don't have a blog then no prob, you can still play in our challenges by sharing your projects from public photo sharing sites which includes our Facebook Company Pages for Lost Coast Designs and Carmen's Veranda.  Please include our Challenge info and the link back to our challenge in your photo's description!  As long as the privacy setting for your photo is public you're good to go.  See, it's so easy to join the fun!  FYI, you can't link up projects shared in closed Facebook groups! 

Here's some inspiration from the team to get us started.  ENJOY!
 
Sue used Lost Coast Designs Flying Car, STP Dirigible and Small Cityscape
  
Gail used Lost Coast Designs Gryphon and License Plate Alphabet
 
 
Laurie used Lost Coast Designs Whimsical Flora and Doodle Circles and the Sing clear stamp from Carmen's Veranda


Now it's your turn.  Are you up for the challenge?  We can't wait to see your projects!  
Submit your entries in the linky party below by 5 to midnight PST on the 14th and don't forget to follow us so you don't miss anything!  The team will be posting more inspiration throughout the month so check back and join the fun.

Happy Stamping!
Gail
Challenge Host

Challenge #135 - Let's Fly
January 1st - 14th Please read over out RULES to be sure your entries qualify you to win!
ALL rubber stamp companies are welcome.
Linky closes Friday, January 14th 23.59 PST.
All entries must be entered in our link up but your don't need a blog to win.  See our RULES page for more info


Friday, March 26, 2021

# 118, Where did you get that hat.

Welcome back to Lost Coast Portal to Creativity where Lost Coast Designs and Carmen's Veranda collide to bring you twice the inspiration and double the fun!

Hi and welcome to my blogpost, this is Riet here from the Netherlands.

Its a happy challenge this time.
 I think that a hat makes you happy and sometimes laugh.
And that is what we need in corona times.
But now about the card.

Love this masculine stamp and the steampunk style.
 I used the LCD stamps,
And I used:
Distressink,
Speckled egg
Old paper
Walnut stain
Aged mahogany
Stazon Timber brown
A white pencil
A brown marker
A clock stencil
and a stencil with hand, stars and numbers.

This is how its made.
I started with the distressink speckled egg.
 Made some puddles and picked it up with the paper.
For the second layer i used old paper.
Now stamp the flying car with the stazon timber brown.
Make with a little bit Aged mahogany some stains around the car.
Mask the car and use the stencils with the aged mahogany. 
Stamp the Destiny stamp.with the brown stazon.
With a blending tool and walnut stain you darken the edges and corners.
Sponge the stencil with the clock with speckled egg.
With the white pencil you color his hat and pants and the vanes of the wings.
Splash some waterdrops on the background and let it dry.
With the brown marker you tap on the background to make some spots so it looks older.
Remove the mask and your done. 
Now glue it on some creme and dark brown cardstock.

Dont forget to join this fun challenge.
Make something with a hat, and have a chance to win some rubberstamps.
How great is that.
You can join here (click on the badge).