Monday, June 28, 2021

Slim line Bees

Welcome back to Lost Coast Portal to Creativity where Lost Coast Designs and Carmen's Veranda collide to bring you twice the inspiration and double the fun!
Hello all..Cathy here with a slimline card for you.
Stamps Used:

I stared off making the the squares for the card. I used 2 yellow distress sprays to color the paper then I used a brown to add the spots. 

I then stamped the Large chicken wire background with  the same brown all over the square. I didn't ink it all over so there are some spots that a not there. 
Next I cut it in to 1 and 2 inch squares. When I had them all cut I stamped the bee from the Bugz Set with black ink on different parts of the 1 and 2 inch squares. I set that aside to work on my card base.

I used Kraft cardstock and that same brown distress ink and stamped the Large chicken wire background for the background of my card. As you can see I have a black strip of cardstock on my card because I didn't get the stamp lined up perfectly. 
I then arranges the squares how I wanted them on the front and glued them into place. Lastly I stamped the bee definition on the bottom corner. 

I hope you will join us with the challenge here.

Saturday, June 26, 2021

Inchie Twinchie Background: Fit for A King

Welcome back to Lost Coast Portal to Creativity where Lost Coast Designs and Carmen's Veranda collide to bring you twice the inspiration and double the fun!

Hey again from Laurie with a second project for the Inchie Twinchie background challenge.  You will create a stamped background for your project using "inchies and twinchies" - one inch by one inch squares or two inch by two inch squares.  I fudged a bit on this one and made my squares one and a half inches - so I guess I can call them Inchies and a Half!

I started with a Gelli print I had on hand, and using the Doodle Circles and White Waves background stamps from Lost Coast Designs, I stamped each stamp onto the Gelli print using black ink.  I then cut out each into one and a half inch squares.  I mounted those in alternate order onto a piece of Kraft card stock and trimmed around the edges. 

 Next I stamped the Chess Knight from Lost Coast Designs onto a piece of coffee dyed paper and fussy cut it out.  I then mounted my cut knight to a piece of black card stock and cut around it for the second time.  I adhered this to the right side of my card front with foam tape to give it some dimension.  I added some gold Nuvo Crystal Drops to the top of the crown.

I stamped the Hokey Pokey Clinic clear stamp from Carmen's Veranda onto a scrap of my coffee dyed paper using black ink, cut it out and layered it with a piece of black paper.  I attached it to the left of my knight and my card is done!

So get out your rubber stamps (or clear acrylic stamps) and make an Inchie Twinchie background project for a chance to win some free stamps from Lost Coast Designs and Carmen's Veranda!


Thursday, June 24, 2021

Inchie Twinchie background: Pink, white and gold.

Welcome back to Lost Coast Portal to Creativity where Lost Coast Designs and Carmen's Veranda collide to bring you twice the inspiration and double the fun!

Hello everyone, it's Liesbeth here showing you a nice and easy technique for making inchies and twinchies backgrounds, with a great effect!
Why not participate and join the fun , click HERE!
You'll find some instruction how I made this here down below:


First I made background papers, using glossy paper and alcohol inks (pinks, yellow, orange and reds) I stamped onto the backgrounds with Versamark ink, and heat embossed with white and gold embossing powder:

I punched out a lot of inchies and tried to create an interesting composition. I sponged the edges using some black StazOn ink and glued the inchies down. 

I finished the cards with some metal embellishments.  Stamps used: ATC Grunge set, ATC Misc. 7 set, and Carmen`s Veranda's Calligraphy Heart Square.


Liesbeth XX


Tuesday, June 22, 2021

Rocking The Retro - Inchie Twinchie Background

Welcome back to Lost Coast Portal to Creativity where Lost Coast Designs and Carmen's Veranda collide to bring you twice the inspiration and double the fun!

 Good morning and a very happy Tuesday. It's Sue here with my second piece for our Inchie Twinchie Background challenge, and again I've used some lovely new rubber.


I started by stamping this wonderful new Flowers background a couple of times as closely together as I could.

Then I cut the huge tag and coloured it in. It was a full on tongue out couple of hours colouring. I don't do it often but I really enjoyed it, I think it has a real retro feel to it - groovy!!  Now to turn it into an inchie /twinchie background.


I stamped again and placed the black and white inchies and twinchies over the coloured ones. it was harder than it looks to find the correct spot!

Then I just added my Carmen's Veranda words to finish off. 

There's still a week left for you to join in with our challenge, so please start chopping your inchies and twinchies! 


Have a very happy day, and thanks so much for looking x


Sunday, June 20, 2021

#124 Inchies and twinchies, Victoriana inchies.

Welcome back to Lost Coast Portal to Creativity where Lost Coast Designs and Carmen's Veranda collide to bring you twice the inspiration and double the fun!


Hi there, Riet here.
Today a card with inchies. 

Completely new to me, and what a small size that is. 
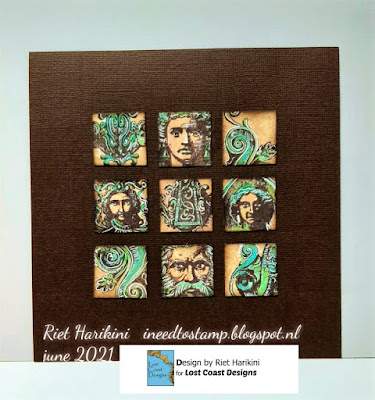
In the end it became this card. 
Made with the beautiful Victoriana sheet.
Step 1.
I dabbed a blank card in distress antique linen and frayed burlap. 
Cut 9 inchies and stamped them with parts of the stamps. 
I used stazon timber brown for that.

I colored the inchies with markers and a white gel pen. 
I sponged the edges with distressink walnut stain. 
The inchies are now ready to glue onto the card. 
The team would love to see your work.
So join us in this fun challenge. 
And who knows, you might win that prize. 
Good luck and most of all have fun creating your Inchie/Twinchie.
Click on the banner to join the challenge.


Friday, June 18, 2021

Pineapple Summer

Welcome back to Lost Coast Portal to Creativity where Lost Coast Designs and Carmen's Veranda collide to bring you twice the inspiration and double the fun!
 
Hello Portal Peeps.  Gail here today with a hot and juicy summer make.  Gotta love some fresh pineapple when the summer temperatures are soaring.
I've made an Inchie Twinchie background using Lost Coast Designs Grunge Border 2" and Carmen's Veranda's Pineapple
I stamped Carmen's Veranda's Pineapple, the fruit with Dandelion archival ink and the leaves with Library Green archival ink.  I coloured the fruit with Mustard Seed distress ink and the leaves with Mowed Lawn distress ink.  Then I restamped the fruit with Potting Soil archival cos the whole no line thing was just too bland and there is nothing worse than a bland pineapple!!
I wanted a hot background so I stamped Lost Coast Designs Grunge Border 2" with red Carnation archival ink, coloured with Mustard Seed distress and chopped it into 1" and 2" squares.
I arranged my Inchies and Twinchie on a red base card in an ascetically pleasing manner.
Add the pineapple and it's Pina Colada time!!!
Join the Inchie Twinchie fun for a chance to win Lost Coast Dollars!!
Hugz

Wednesday, June 16, 2021

Inchie and Twinchie Background: Mechanical Horse

Welcome back to Lost Coast Portal to Creativity where Lost Coast Designs and Carmen's Veranda collide to bring you twice the inspiration and double the fun!

Happy Summer to all you Lost Coast bloggers and welcome to this new challenge:  Inchie Twinchie Backgrounds.  If you don't know what inchies and twinchies are, think little one inch squares for inchies and two inch squares for twinchies.  For this challenge, you will create a background using inchies and or twinchies to make a background, using some rubber stamping.  

I have a sample below that uses the following stamps from Lost Coast Designs:

The Ledger  background stamp
The Gears background stamp

I started with some Tim Holtz papers and stamped the Gears and Ledger background stamps onto two pieces using black ink.  Using my blade cutter, I cut one inch squares of each pattern and glued them in alternating order onto a piece of black card stock.  I made 5 rows across and 5 rows down to form a square.  I trimmed around the edge of the black paper to create a border.  

Next I stamped my Steampunk Pony onto a piece of off white paper using black ink.  I layered this with a piece of black card stock and glued this to the center of my inchie background.  I added some gears for the wheels and that's a wrap!

Can't wait to see what you can create with inchies and twinchies.  If it's your first time making something like this, I think you will find it's a lot of fun and you can create some really interesting backgrounds with this technique.  Be sure to post your photos for a chance to win some free stamps!


Tuesday, June 15, 2021

CHALLENGE #124 - INCHIE TWINCHIE BACKGROUND

Welcome back to Lost Coast Portal to Creativity where Lost Coast Designs and Carmen's Veranda collide to bring you twice the inspiration and double the fun!
 
Hello Portal Peeps.  
 
It's time for our new Challenge.
Our challenges are now fortnightly!  A new challenge starting the 1st and the 15th of every month, with chances to win Lost Coast dollars. We will be announcing winners on the 5th of the month, so do pop back and see who wowed the team and gets our snazzy blog badge and the coveted Lost Coast dollars.

Now for our new Challenge!

CHALLENGE #124

INCHIE TWINCHIE BACKGROUND


We want you to include stamped Inchies (1"x1") and/or Twinchies (2"x2") on your background.  Stamp, cut it up and rearrange it, like patchwork.  So you can use a whole stamped background and cut it up and rearrange it, or stamp on scraps with different stamps and piece it together, or do some fancy masking!  If you want to just add some stamped inchies then that's another interpretation so that works for the theme as well, but they should be a prominent part of your design.  Show us your interpretation but real rubber or clear stamping and the theme must be the focus of your project.  A small stamped sentiment in a sea of die cuts or digi images will not qualify to win the prize and you may be deleted!!!!  Bwahahhaaahaha.

Please remember we do have some Challenge Rules to follow so look them over to ensure your entries qualify to win this month's prize!

You are welcome to play in our Challenges using rubber stamp images from any company but if you use any of our Lost Coast Designs or Carmen's Veranda stamps...we love it when you do...then your entry counts as two which doubles your chances of winning in our random prize drawing.

PRIZES

To ensure you all have a fabulous time playing in our Challenges this is how our Prize system works!
The more entries the better the Prize so tell all your friends to join the fun too!

1 - 4 Entries = one winner chosen by the team is awarded our Challenge Winner's Badge
5+ Entries = one randomly picked winner will receive a $5 gift certificate to spend at
Lost Coast Designs/Carmen's Veranda
10+ Entries = one randomly picked winner will receive a $10 gift certificate to spend at
Lost Coast Designs/Carmen's Veranda
and all winners get our snazzy Challenge Winner's Badge to proudly display on their blogs!

If you don't have a blog then no problem, you can still play in our challenges by sharing your projects from public photo sharing sites which includes our Facebook Company Pages for Lost Coast Designs and Carmen's Veranda.  Please include our Challenge info and the link back to our challenge in your photo's description!  As long as the privacy setting for your photo is public you're good to go.  See, it's so easy to join the fun!  FYI, you can't link up projects shared in closed Facebook groups! 

Here's some inspiration from the team to get us started.  ENJOY!
 

Sue used Lost Coast Designs Spikey Fish, Anchor Fish, Gears 2 and Carmen's Veranda All Who Wander
 
Gail used Lost Coast Designs GNOMES!!!!!! 


 Now it's your turn.  Are you up for the challenge?  We can't wait to see your projects!  
Submit your entries in the linky party below by 5 to midnight PST on the 30th and don't forget to follow us so you don't miss anything!  The team will be posting more inspiration throughout the month so check back and join the fun.

Happy Stamping!
Gail
Challenge Host

Challenge #124 - Inchie Twinchie Background
June 15th - 30th Please read over out RULES to be sure your entries qualify you to win!
ALL rubber stamp companies are welcome.
Linky closes Wednesday, June 30th 23.59 PST.
All entries must be entered in our link up but your don't need a blog to win.  See our RULES page for more info


Monday, June 14, 2021

#123 challenge "Save the trees"

Welcome back to Lost Coast Portal to Creativity where Lost Coast Designs and Carmen's Veranda collide to bring you twice the inspiration and double the fun!

Hi there, Riet here.
What a special challenge it was this time. 
I have seen a lot of beautiful things pass by from my teamsters. 
Did you enjoy it s as much, as I did? 
Here is my last contribution for this challenge. 
I used the stamp from the Victoriana sheet.
I sponged the background with different shades of green. 
I stamped the head with Stazon Olive green. 
And scratched into the stampbord with a fine knife. 
I attached  a green cord to it. 
And now I have a beautiful necklace. 
I hope you make something for our fun challenge to. 
We would love to see your work on our challenge blog.
Come and join, there is rubber to win.
Please read our rules before you enter the challenge.


Saturday, June 12, 2021

Gnome Dreams in Cork

Welcome back to Lost Coast Portal to Creativity where Lost Coast Designs and Carmen's Veranda collide to bring you twice the inspiration and double the fun!
 
Hello Portal Peeps.  Gail here today.  The team is having fun stamping on unusual surfaces this fortnight for out Save the Trees challenge.  We want to see projects with stamping on something other than normal paper or card.   Loads of fabulous ideas being shared by the team so scroll down and check out all the awesome makes.  But first......
 

I decided to try stamping on some cork sheets.  I've used Lost Coast Designs Coffee Gnome and Dictionary Words.

I used 3mm thick placemats that I bought at IKEA to back ceramic coasters.  It's quite coarse grained, and you can buy thinner finer grained sheets, but this is what I had.....  I stamped the dictionary words and embossed with black powder.  The cork is quite absorbent so I found it helpful to stamp twice with black archival, then with Versamark before embossing.  Obviously a stamping platform or positioning tool is helpful with this.

 
I was pleased with how well the details embossed.  You can easily read the large words and see that the smaller ones are words, but not so readable.  I cut the words out using scissors and ran a black promarker around the edges.  I think these are quite cool!

 
Flushed by my success I decided to try a gnome!!  Pretty good, but fussy cutting wasn't as easy as with paper.  The cork cut easily but the coarse grains tended to be a bit friable.  As I said, thinner and finer grained cork sheets are available.  But he's pretty cool and I love that he easily coloured with Promarkers.  The embossed lines prevent colour bleed.  I used a white gel pen on his beard.

I decided to add the gnome and the Dream panel to a die cut patterned card panel and made a card.  I cut the gnome's stump away so he could sit on the edge of the sentiment.

This is such a fun challenge theme and I am really enjoying seeing all the different substrates people are stamping on.  Join the fun.  Linky closes 14th June 23.59PST


Thursday, June 10, 2021

Save the trees: Fabric book cover ,Frida'

Welcome back to Lost Coast Portal to Creativity where Lost Coast Designs and Carmen's Veranda collide to bring you twice the inspiration and double the fun!

Hello everyone, it's Liesbeth again, stamping on everything but paper! There's still time to participate our ,Save the Trees' challenge: click HERE.
This time I've chosen a big piece of white fabric, used lots of stamps on it and covered an A4 plain book with it! Unfortunately I can't explain how I exactly did it, because this technique is one of my workshops.....


Liesbeth XX

Tuesday, June 8, 2021

My Untidy Mind

Welcome back to Lost Coast Portal to Creativity where Lost Coast Designs and Carmen's Veranda collide to bring you twice the inspiration and double the fun!

 Good morning and a very happy Tuesday. It's Sue here with my piece for our Save The Trees challenge.  By that, we mean to stamp on anything other than ordinary paper. I decorated a phone holder 'cos you can never have too many of these.

I started with my naked phone holder (I'm sure it's not real wood lol)
I applied some base paint by pressing it on my gelli plate, then I stamped with Doodle Circles. This is a lovely stamp to colour in, which I did with paint pens and silver acrylic.

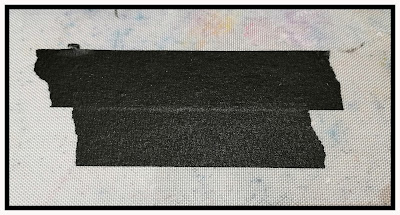
Next came the sentiment. If I'd thought this through I'd have realised that I could have used tissue paper, but never mind. This is construction tape - a little like duct tape but you can paint it. So I just stuck it to my craft mat then painted it white.

Then I stamped my Carmen's Veranda Tidy Minds stamp.

I just cut around it and stuck it in place. I was a little bit surprised that it was still sticky, but it certainly was!


And this is how it looks with my phone in place! I don't know how, but this cover blends in wherever it is, so it's great to have a proper place for it (and this way I remember to charge it too so it's a win-win!)

I only used 2 stamps on this one, that must be some sort of record! I've used


I hope you like it, and that you join in with our fun challenge. Take care, and thanks so much for looking xx