Showing posts with label Shrink Plastic. Show all posts

Thursday, October 16, 2025

31 Days of Halloween, day 16

Welcome back to Lost Coast Portal to Creativity where Lost Coast Designs and Carmen's Veranda collide to bring you twice the inspiration and double the fun!

Hi, Riet here,
 

It's already the 16th day of Halloween Challenge month.
For my contribution, I made a choker necklace.

Stamps from Lost Coast designs,
I cut a bat from a sheet of shrink plastic.
I drew the bat using a stencil from Angies Happy Hobby.
She has the most amazing stencils with mask.

I stamped the Frida skull with Stazon Jet Black and colored it in with markers.
Then I put on a mask of the fridah skull and stamped the spider web with resist fluid.
Let everything dry completely and then sponge it with Distress Oxide Hickory Smoke.
The edges were sponged with Distress Oxide Black Soot.
Once everything is thoroughly dried, you can heat and shrink the shrink plastic.
You can make the choker using your own imagination or buy it ready-made.
I hope you enjoyed it.
Maybe you've made something for Halloween too? 
Show us and you could win new stamps.
Join us on the LCD blog.


Monday, October 24, 2022

31 Days Of Halloween Day 24 - Cat Lovers Hop

Welcome back to Lost Coast Portal to Creativity where Lost Coast Designs and Carmen's Veranda collide to bring you twice the inspiration and double the fun!
 
Hello Portal Peeps!  I'm so excited!!!  Halloween is approaching fast and Cheshire Cat is here today with scary fang and claws keyring style!!!

Now isn't that purrfect!
 
Today is also the start of the fabulous and amazing Cat Lovers Hop and Lost Coast Designs are proud to again be one of this year's sponsors.  
Yet another opportunity to win Lost Coast Designs stamps, or one of many other prizes.  Hop over to Her Peaceful Garden and check out all the fun.
 
I stamped Lost Coast Designs Cheshire Cat on white shrink plastic.   I coloured with sharpies and distress markers.  I tried to keep the colours light because shrinking always concentrates the pigments.  I cut around the cat and then punched a hole in his head!  Bwahahhahaaa.   Then I used my heat gun to shrink him.
I added a keyring thing and he's ready to party!!!   Here's the finished shrunken cat against the original size stamped image.  Isn't he adorable!!!!!
 
Remember you also have two challenges here on the blog to choose from as well so link up your makes for a chance to win!

Saturday, October 23, 2021

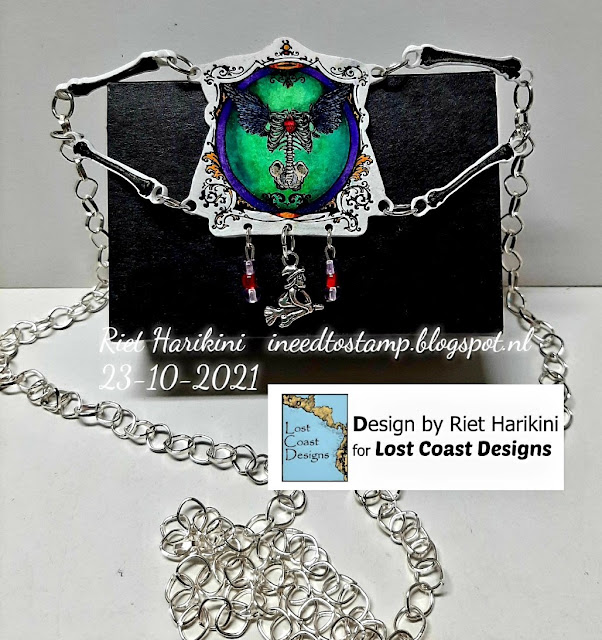
31 Days of Halloween. Day 23, Halloween necklace.

Welcome back to Lost Coast Portal to Creativity where Lost Coast Designs and Carmen's Veranda collide to bring you twice the inspiration and double the fun!


Hello everybody, here a new post from Riet.
I made a Halloween necklace for Halloween.
Here is what I used and how I made it.
I used:
I would like to point out that,
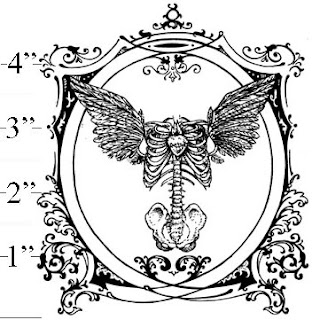
 these stamps are very large which makes them very suitable for shrink foil.
If the stamp is too small, a small image will remain after shrinking.
Which you can barely see.


                                       Shrink plastic, in the Netherlands its cald "krimpie Dinkie".
Black Stazon
Color pencils or markers.
We r memory keepers- Multi hole punch
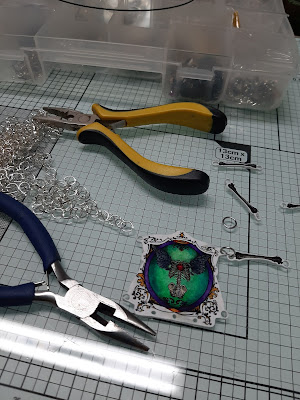
Metal chain
metal rings
2 small pliers
Sissors
pencil for drawing.
Heattool

I started by printing the stamp with stazon and letting it dry well.
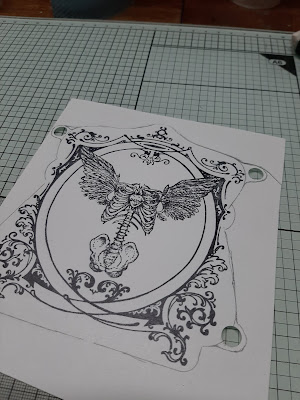
With a pencil I drew a shape around the print and cut it out.
Be very careful to punch the holes first.
You have to cut this as shown in the photo.
This is where the rings will hang later.

Erase all pencil lines after cutting.
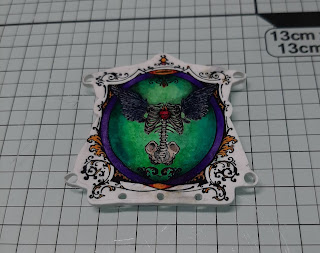
Now you can color the image.
Do this with light colors and fairly thin.
The melting will make the color much darker.

After heating it with the heattool it looks like this.
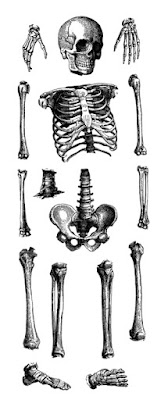
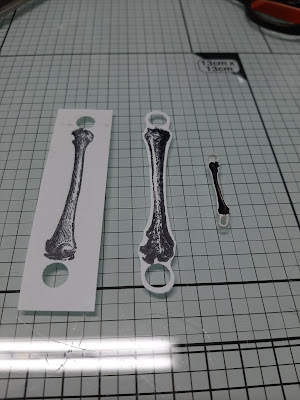
Now we repeat all this again with 4 x a bone of the large skeleton.
And dont forget to punch the wholes.

I colored the bones with a sand color.

Now we attach the rings and the chain to it.
And you are done.
Hope you had fun with this tutorial.

It would be great if you also join our Halloween challenge. 
Make a card, tag, mixed media project or whatever you can think of. 
If only it has some stamping on it. 
 You don't even have to use the Lost Coast stamps,
Other brands are also allowed.
So come and take a look at our challenge blog and join us.
You maybe the winner of new rubber stamps.


Wednesday, March 10, 2021

#117 Mini me, Frida skull necklace.

Welcome back to Lost Coast Portal to Creativity where Lost Coast Designs and Carmen's Veranda collide to bring you twice the inspiration and double the fun!


Hello, stamp friends, Riet here.
What a great challenge Gail (teamleader) has given us.
Mini me, love it.
This challenge really sparked my imagination. 
I love shrink foil, so that was the solution to make something small.
And this is the result, a Frida skull necklace.
Hope you enjoy it.

This is what you need to make the necklace.
White shrink foil.
Markers or pencils
Stazon Jet black

First we start with stamping the Frida skull.
Color it, keep in mind that you keep the colors light,
When the foil is heatted and shrinks the colors will be much darker.
Cut it out and heat it in oven or with the heattool.
Read the instructions on the shrink foil package.
Next step is to take a die and cut it out on your machine.
Dont have a die cut machine? no worry, you can cut a form with a scissors.

Dont forget to make the holes, make them big because of the shrinking.
Mine where as big as a pencil.

Stamp with the stazon the fourth demension stamp.

Now wait till the ink is completely dry.
When not dry it can smug when you shrink it.
Now you glue the skull on the background


Attach a few metal rings through the holes, like on the picture.


continue to assemble the chain as shown on the picture.

I hope you have as much fun with this necklage as I had.
Thanks for reading my post, and have fun with making your own juwelry.

Dont forget to show your mini me on the LCD blog in the challenge.
You have a chance to win some rubberstamps.
And please read the rules first.


Friday, May 8, 2020

On The Button

Welcome back to Lost Coast Portal to Creativity where Lost Coast Designs and Carmen's Veranda collide to bring you twice the inspiration and double the fun!

Hello Portal Peeps!  I hope you are having a good week.  Gail here today with a little more inspiration for the Turquoise and Terracotta challenge.  These two colours are just made for each other and I decided to get a little bit arty with the already arty Carmen's Veranda Bullseye Face stamp.

I started by stamping Bullseye Face onto a white card base with Bluebird archival.  I stamped tight against the hinge of the card and then trimmed my card base down a little.  Then I coloured various sections of the image with Rusty Hinge distress ink and edged with brown Promarker pen.
I stamped again on white shrink plastic with the same Bluebird ink, cut with a circle die and again added some Rusty Hinge colour.  I also edged with brown Promarker pen before shrinking.
 I added the shrinky dink to the bullseye and also three small pale blue brown dotty buttons on the right hand side.
https://lostcoastportaltocreativity.blogspot.com/2020/05/challenge-98-turquoise-and-terracotta.html
  Join the Turquoise and Terracotta challenge for your chance to win!

Monday, February 24, 2020

Tall Tales

Welcome back to Lost Coast Portal to Creativity where Lost Coast Designs and Carmen's Veranda collide to bring you twice the inspiration and double the fun!

Hello Portal Peeps!  Gail here today with a card featuring Reindeer Gnome and some repeat stamping for the current Monkey See, Monkey Do challenge.  This gnome strikes me as a teenager and I can imagine hem's parents saying 'You're not going out wearing that are you!!  But I figure it's a pretty good hat for the days hem's gnoming at the bad advice bureau!!
Obviously the signage is for near and far sighted customers!!

I started by stamping Lost Coast Designs Fruit Pods Background on my white card base with Prickly Pear archival ink.
I stamped Carmen's Veranda Bad Advice sentiment on a scrap of white card with black archival and used the Prickly Pear ink to edge and add some colour to the white card.  I popped it up on a scrap of craft foam.
I stamped Reindeer Gnome on white card with black archival, coloured with Promarkers and glitter glue and fussy cut.  The Bad Advice sentiment I stamped on white shrink plastic, shrunk it and added it to the card on a Gail design 'wood post'!!

https://lostcoastportaltocreativity.blogspot.com/2020/02/challenge-93-monkey-see-monkey-do.html
Join our Monkey See Monkey Do challenge with your stamped projects featuring monkeys and/or repeat stamping for a chance to win Lost Coast Design dollars!!!

https://lostcoastportaltocreativity.blogspot.com/2020/02/design-team-call.html

Wednesday, March 20, 2019

20 Past Frank and Other Stories + A Giveaway

Welcome back to Lost Coast Portal to Creativity where Lost Coast Designs and Carmen's Veranda collide to bring you twice the inspiration and double the fun!

Hello.  Gail here today.  It's been too long since I had a date with Frank so I decided to make myself a pendant for the big day.  I got a bit carried away, but, as you know, good things come in threes......
Meet the Franks.......

I cut a piece of shrink plastic with a Sizzix die and stamped Frank with black archival.
I masked Frank and stamped Carmen's Veranda Dice Background with Mowed Lawn distress ink.
I coloured Frank with Shabby Shutters distress ink and used my heat gun to shrink him.  Here's a sort of before and after photo.  My circles went from 8.5cm to 3cm.  I liked it so much I decided to make a couple more.
For this one I used Brunhilda's shield and Colourbox Irish ink for the background stamping.
I used the PMC Circle Frame stamp here.  Didn't get a perfect impression, but remember, when you shrink the colours intensify, so I thought I'd go with it.
So here's my three shrunken Franks.  I found a selection of metal findings that I get from a company here in Norway called Korthobby.  The flower at the bottom comes shaped so I ran it through my Bigshot to flatten it out.  It looks nicer with curves, but thought it would be easier to stick everything together if everything was flat.
Calling this one Flower Frank.
This ring made me think Emperor Frank
Calling this one 20 Past Frank.  Incidently, I used water when I coloured this one with the shabby shutters distress ink.  The other two I applied the ink with a sponge and no water.  The water is a bit more tricky with the whole shrink plastic thing, but you get a brighter shade of green.  
Thanks for dropping by.  
https://lostcoastportaltocreativity.blogspot.com/2019/03/challenge-72-round-and-round.html
You have until the end of the month to link up your stamped Round and Round makes, or your stamped makes featuring round things for a chance to win Lost Coast dollars.  Remember, the more players the bigger the prize........  
And we are also sponsoring the Penny Black and More Challenge this month where they want to see Circles so link up there as well for another chance to win.....

For a chance to win one of these three pendants (chain not included) leave me a comment on the Lost Coast Portal to Creativity blog telling me which Frank you like the best, and one on the facebook fan group post to say you did that, and I will pick one lucky person and announce the winner on the 5th April.