Showing posts with label grungetree. Show all posts

Thursday, April 16, 2026

#208 Gnomes challenge, ATC's with the mini gnomes.

Welcome back to Lost Coast Portal to Creativity where Lost Coast Designs and Carmen's Veranda collide to bring you twice the inspiration and double the fun!

Hi, its Riet here.


The Lost Coast Designs/Carmens Veranda Stamps challenge is so much fun. 
LCD has such cute mini gnome sets. 
These are very suitable for ATC cards.

For these ATC cards, I used:
Derwent inktense pencils.
Black water resistent ink, I used Versafine onyx black.
White gellpen.
Posca pen pink, lilac and white for the blossem.
Silver marker for the metal accents on the jukebox.
Masking tape.

How to make the ATC cards.
1. Stamp the flower gnome and mask it.
2. Stamp the middle tulip and mask it.
3. Stamp the other tulips.
Color with Derwent Inktense.
The background is also colored with the inktense pencils.
Stamp "For you" with black ink.
Give it some accents with the white gellpen.

The jukebox ATC is done in the same way.
Only the metall accent ar done with the silver marker.

For the sleeping gnome its the same.
Make blossem with the Posca markers.

If you want to participate in the challenge, here is the link.
There is, of course, a prize to be won.
If you want to know everything about it, you can read the rules here.


Tuesday, October 1, 2024

31 Days of Halloween Day 1

Welcome back to Lost Coast Portal to Creativity where Lost Coast Designs and Carmen's Veranda collide to bring you twice the inspiration and double the fun!

 
Hi there, Riet here.
 Its the start of the 31 Days of Halloween challenge at Lost Coast designs/Carmen's Veranda stamps.
Love, Love , Love Halloween theme crafts.
And it's a Halloween challenge the whole month.
So here is my tag for Halloween.

I used:

Distress ink,
Old paper
Pumice stone
Iced spruce
Dusty concord
Versafine onyx black
White gellpen
Water resistent fineliner
Blue, grey and brown colorpencils
Small circkle punch
Perfect resist
Tag die

How to make the tag.
Take a small amount of perfect resist and a sponge. Dab your sponge in the resist liquid and apply it to the spider web stamp. Make a good print in one go. Let it dry very well.

Now sponge the distress ink Old paper,
Pumice stone, and
Iced spruce onto the card.
let it dry well.

Take a piece of white paper and stamp the Checkerboard border on it.
Sponge them purple with the distress ink dusty concord.
Die cut the tag and glue the checkerboard borders on it.

Stamp the raven with the black versafine.

If you didn't hit all the spots properly, you can touch it up with the fineliner.

Color the raven and the branch he is sitting on.
And stamp the words in black.
Because I thought the tag on the right side was a bit bare, 
I also stamped the grunge tree here.
Mat the tag with black cardboard.
With a punch I make a ring of black cardboard, glue it on and make a hole in it.
You can now put a cord or string in there.


Now its your turn.
Make something with a Halloween or day of the dead theme.
Don't forget to use some stamps.
Please read the rules, to avoid disappointment.

Good luck and till next time.


CHALLENGE #190 - 31 DAYS OF HALLOWEEN LINKY

Welcome back to Lost Coast Portal to Creativity where Lost Coast Designs and Carmen's Veranda collide to bring you twice the inspiration and double the fun!
 
Hello Portal Peeps,
Welcome to our annual 31 Days of Halloween celebration!
The team will be posting their spooktacular makes every day this month.
This linky will be open all month and we hope you will get your boo on and join the fun.  You can link up your Halloween inspired makes all month for chances to win Lost Coast dollars. We will be announcing winners on the 5th of the month, so do pop back and see who wowed the team and gets our snazzy blog badge and the coveted Lost Coast dollars.

CHALLENGE #190

31 DAYS OF HALLOWEEN

Link up your Halloween inspired projects.  Anything related to the season, spooky, fruity, fun, scary or cute.  Real rubber or clear stamping and the theme must be the focus of your project.  A small stamped sentiment in a sea of die cuts or digi images will not qualify to win the prize and you may be deleted or fed to the giant pumpkin!!!!  Bwahahhaaahaha.

Please read the updated Challenge Rules to ensure your entries qualify to win this month's prize!

You are welcome to play in our Challenges using rubber stamp images from any company but if you use any of our Lost Coast Designs or Carmen's Veranda stamps...we love it when you do...then you could win a bigger prize in our random prize drawing.  All winners get our snazzy Challenge Winner's Badge to proudly display on their blogs!

If you don't have a blog then no problem, you can still play in our challenges by sharing your projects from public photo sharing sites which includes our Facebook Company Pages for Lost Coast Designs and Carmen's Veranda.  Please include our Challenge info and the link back to our challenge in your photo's description!  As long as the privacy setting for your photo is public you're good to go.  See, it's so easy to join the fun!  FYI, you can't link up projects shared in closed Facebook groups!  
 
Riet is getting us started today with this gorgeous tag using Lost Coast Designs Grunge Tree, Spiderwebs Background, Checkerboard Border and MRaven2 with Carmen's Veranda's When Witches Go Riding sentiment
 Are you up for the challenge?  We can't wait to see your projects!  
Submit your entries in the linky party below by 23.59 PST on the 31st and don't forget to follow us so you don't miss anything!  The team will be posting more inspiration throughout the month so check back and join the fun.

Happy Stamping!

 
Challenge #190 - 31 Days of Halloween
October 1st - 31st Please read over out RULES to be sure your entries qualify you to win!
ALL rubber stamp companies are welcome.
Linky closes Thursday, October 31st 23.59 PST.
All entries must be entered in our link up but your don't need a blog to win.  See our RULES page for more info


Monday, September 18, 2023

#175 Its all about "Birds" this challenge.

Welcome back to Lost Coast Portal to Creativity where Lost Coast Designs and Carmen's Veranda collide to bring you twice the inspiration and double the fun!

Hi there, Riet here.
 What a nice challenge this is.
Who doesn't love birds.
For this challenge I used the stamps:
This is a stampsheet with individual words and I must say, I use them a lot.

What else did I use:
Stazon midnight blue.
Distress ink,
Evergreen bough,
Peacock feathers,
Twisted citron,
Mowed lawn.
Versamark.
Gold embossing powder.
Blonde moments EP Savory Sky Iridescent,
White gel pen.
Blue and green colored pencils or markers, whatever you prefer.

How I made it.
I started with the 4 distress colors on the craft sheet and a little bit of water.
I ran the paper through that and made ink spots.
I stamped the edges with a stamp from the brushstrokes sheet,
 and Stazon midnight blue.

I forgot to photograph the next step.
But that is not difficult to do.
Take a thin paper and stamp the Gothic window
 with the stazon midnight blue and color it with the pencils or markers.
Stamp the window on the background as well.
Cut out the colored window and glue it to the stamped print on the card.
Give the window some accents with the white gellpen. 
Stamp the Raven with the Versamark and 
sprinkle the dark blue embossing powder on top.
 
Use a heattool to melt the embossingpowder,
And now you see the beautifull dark blue shine.
Just look how beautiful this dark blue color is.

Now we move on to the grunge tree.
The grunge tree has a frame and I didn't want to stamp it.
So I covered it with tape.
The stamp was inked with Versamark.
Remove the tape before making the print.
Sprinkle with gold embossing powder and use the heat tool to melt it.
I did the edge of the card with my finger. 
Press your finger on the versamark and swipe along the edges.
Sprinkle with gold embossing powder and use the heat tool to melt it.
With the stazon midnight blue the word "Fly" is stamped here and there.
In the window I gave the glass some shade with a dark blue pencil.
And some white accentswith the gellpen on the stone frame of the window.

Hope you liked this tutorial.
And dont forget to join the challenge.
Thanks for visiting the blog.


Wednesday, October 5, 2022

Day 5, 31 days of Halloween. When witches go riding.......

Welcome back to Lost Coast Portal to Creativity where Lost Coast Designs and Carmen's Veranda collide to bring you twice the inspiration and double the fun!

Hello all, Riet here on the 5th day of the Halloween month.
Do you also love Halloween?
I do, and Lost Coast Designs and Carmen's Veranda,
 have super cute Halloween rubber stamps.
So I started working with my stamps and ink.
This time a card with a lot of ink blending.

Stamps I have used.
What else I have used:
Versafine onyx black.
Stazon jet black
distressink,
Dusty concord
chipped sapphire
Seeds preserves
black kind
spiced marmalade
Mustard seed
crackling campfire
Distress Oxide Dusty Concord
Purple and black background cardstock
Stencil for the purple background
maskin tape
circle punch
White gel pen.
White pigment ink.
Die cut tag.
Halloween embellishments.

I started by stamping the witch with the stazon jet black.
Without masking the witch, I stamped the grunge tree over it.
I did this on purpose because I wanted to make it look,
 like the witch is flying behind the tree.
Now I mask the witch.
With an ink blending tool I made a large spot with musterd seed,
 on the spot where I want the moon.

There I stick the circle mask on the yellow spot 
and go over it again with the musterd seed ink blending tool.

I did it also in the right under corner.

     With a piece of torn paper I made some hills. 
On the left with crackling campfire,
 and on the right with spiced marmalade.
I also went over the Crackling campfire with a bit of seedles presurves.

With distress seedles preserves, chipped sapphire,dusty concord I further finished the sky.
I finished the edges with distress black soot.

I colored the witch in with some markers.

I have outlined the witch, the hills and the tree with a white gel pen, 
so it looks like the moon is reflecting light.
Put stars in the sky with the gel pen, also some shooting stars.
And some white dots on the tree trunks.

Using Colorbox white ink and the white gel pen,
 I applied some horizontal streaks like wisps of fog.

Now take the purple cardstock and the stencil.
With the distress oxide Dusty concord and a blending brush,
 we apply the pattern of the stencil.
Set it aside so that it can dry thoroughly.

Now the text label.
Die cut a tag/label.

                                     With an ink blending brush, apply distress musterd seed on top.
 And spiced marmalade on the outer edges.

Do the edge with distress black soot.
Stamp the text with Versafine onyx black.

Now assemble the card and glue some nice embellishments on it.

You must have allready made something fun for Halloween.
Then join our challenge, but read the rules first, so you avoid disappointment.
So join us and have chance to win some rubberstamps.


Tuesday, May 10, 2022

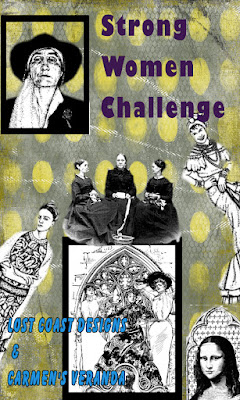
#143 Strong woman challenge

Welcome back to Lost Coast Portal to Creativity where Lost Coast Designs and Carmen's Veranda collide to bring you twice the inspiration and double the fun!


Hello everyone, Riet here.
Today a card for the challenge with the subject "strong women".
I have chosen the Lycaonia stamp
I think it is a real strong woman as she sits there between her wolves.
For the background I used the grunge tree stamp.
The text is by Carmens Veranda, there you will find the funniest and most beautiful texts and sayings.

What else did I use:
Smooth cardboard.
Clear embossing powder.
Spray ink in turquoise.
Pencils or markers for coloring.
Versamark.
Stazon black.
Clear embossing powder.

How did I make it.
I first stamped the Grunge tree with Versamark.
And sprinkled with the embossing powder.
Melted the embossing powder with the heat tool.
When the card has cooled down, spray the spray ink on it.
Do the same with the card with the text.
Now set it aside and let it air dry.
Continue with the Lycaonia stamp.
Stamp with stazon black on a thin paper and color it.
Cut out the stamp.
The map is now dry and we will continue with this.
Take a sheet of paper and place it on the card and text card.
Use a warm iron to iron off the embossing powder.
But if you like it better with the embossing powder, you can also skip this step.
Now glue the Lycaonia image on the card.
Assemble the card further as in the example, or according to your own idea.

So feel free to join.
You have a chance to win beautiful stamps.
And you can even participate with other stamp brands.
Please read the rules to avoid misunderstandings.
I wish you the best of luck and, above all, a lot of fun making your creation.